Thinking about tiling your home but have no experience? Don’t worry! Tiling is a great DIY project that can save you money and make your home look fantastic. Whether you want to tile your bathroom wall or lay new floor tiles in your kitchen, this guide will walk you through everything step by step. We’ll keep things simple so anyone—even a total beginner—can do it!
And if you need quality tiles, tools, or expert advice, CBFD has everything you need to get started on your tiling journey.
Choosing the Right Tiles
Before you start, you need to pick the right type of tile. There are two main types:
- Ceramic Tiles – Great for inside your home, like kitchens and bathrooms. They are easier to cut and install.
- Porcelain Tiles – Stronger and better for outdoor areas like patios. They resist water and wear better than ceramic.
💡 Tip: If you’re tiling outdoors, always use porcelain tiles. If it’s inside, you can choose either ceramic or porcelain.
Tiles come in different sizes and shapes. Bigger tiles cover more space quickly, but small tiles are easier to fit into tight areas. CBFD offers a wide range of tiles, so you can find the perfect fit for your home.
Tools and Materials You’ll Need
Before you start, gather these tools:
✓ Tile cutter – For cutting tiles to fit edges
✓ Trowel – For spreading tile adhesive
✓ Tile spacers – To keep even gaps between tiles
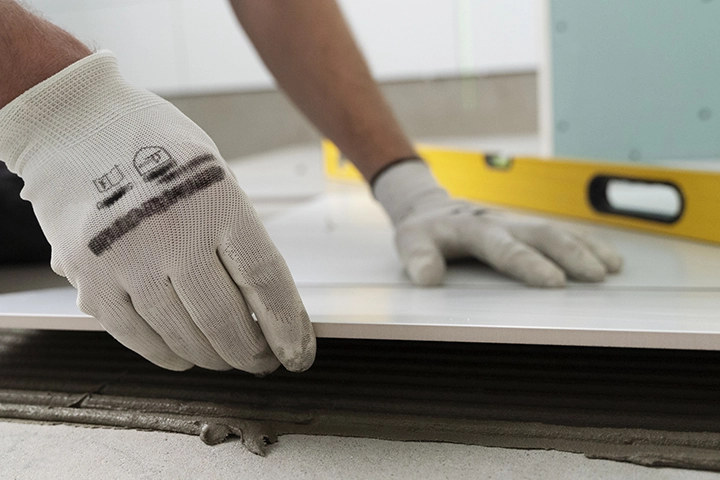
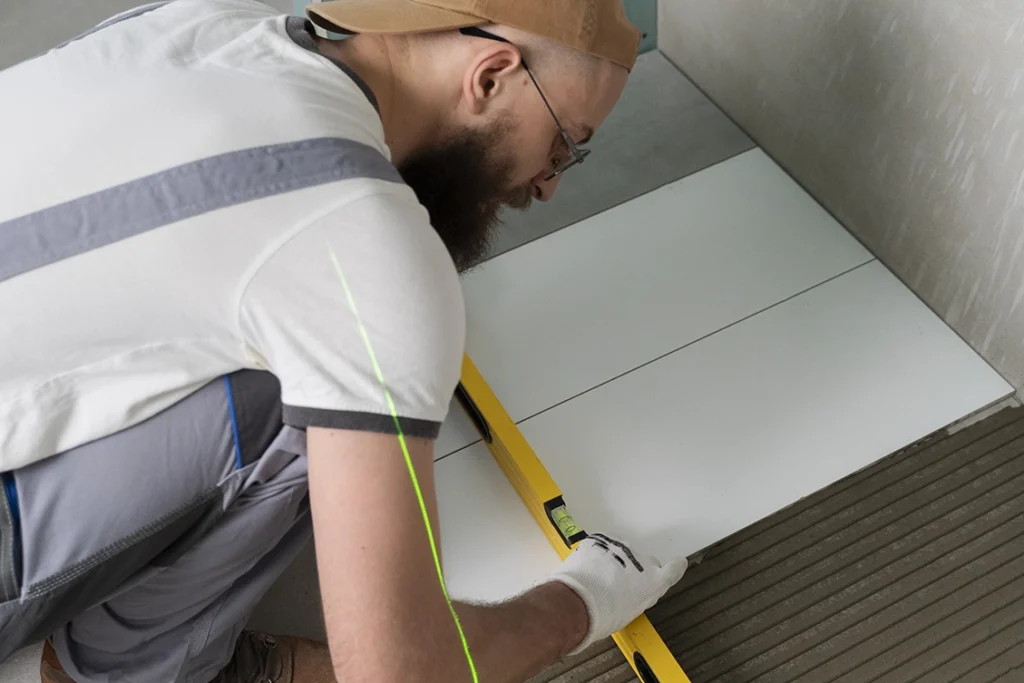
✓ Spirit level – To check if your tiles are straight
✓ Sponge & bucket – For cleaning up grout
✓ Rubber mallet – To gently tap tiles into place
You’ll also need these materials:
→ Tile adhesive – The glue that sticks tiles to the floor or wall
→ Grout – Fills the gaps between tiles
→ Sealer – Protects grout from stains and moisture
Preparing the Surface
A good surface makes all the difference! Here’s what to do:
- Clean the surface – Get rid of dust, grease, or old glue.
- Check for moisture – If it’s damp, let it dry or use a waterproof primer.
- Level the surface – If the floor or wall is uneven, you might need to smooth it out with a levelling compound.
💡 Tip: If tiling over old tiles, make sure they are clean and not loose!
Laying Floor Tiles: Step-by-Step
Step 1: Mark Your Area
Use a measuring tape and chalk to mark the centre of your room. Start tiling from the centre so your cuts at the edges look even.
Step 2: Apply Tile Adhesive
Use a notched trowel to spread adhesive on the floor. Don’t cover too much area at once, or it might dry before you lay tiles.
Step 3: Place the Tiles
Press each tile into the adhesive. Use tile spacers to keep even gaps between tiles.
Step 4: Cut Tiles to Fit
Use a tile cutter to cut tiles for the edges. For small, tricky cuts, use tile nippers.
Step 5: Let It Dry
Wait 24 hours before walking on your new floor so the adhesive can set properly.
Installing Wall Tiles: Step-by-Step
Step 1: Mark Your Starting Point
Use a spirit level to draw a straight line where you want to start tiling.
Step 2: Apply Adhesive
Spread tile adhesive onto the wall using a trowel. Only cover small sections at a time.
Step 3: Place the Tiles
Start at your marked line and press each tile into place. Use tile spacers to keep the gaps even.
Step 4: Cut Tiles for Edges and Corners
For corners and small gaps, use a tile cutter or nippers.
Step 5: Let It Dry
Wait 24 hours before applying grout.
Grouting and Sealing
Once your tiles are set, it’s time to fill the gaps with grout.
- Mix the grout – Follow the instructions on the pack.
- Spread it over the tiles – Use a rubber grout float to push grout into the spaces between tiles.
- Wipe away excess grout – Use a damp sponge to clean off any extra before it dries.
- Let it dry – Wait a few hours before sealing the grout.
- Apply sealer – This helps keep moisture and stains away.
💡 Tip: Use a dry cloth to polish the tiles once everything is dry.
Common Mistakes to Avoid
✘ Not checking if tiles are level – Always use a spirit level to check!
✘ Applying too much adhesive – This can make tiles slip or stick up unevenly.
✘ Skipping drying time – Walking on tiles too soon can ruin your hard work!
✘ Not using spacers – Without spacers, your tiles might end up uneven.
Frequently Asked Questions
Q: How long does tiling take?
A small room can take one to two days, including drying time.
Q: Can I tile over old tiles?
Yes, but make sure the old tiles are clean, solid, and not loose.
Q: How do I cut tiles without a tile cutter?
You can use a glass cutter and a ruler for straight cuts, or tile nippers for small pieces.
Q: Do I need to seal ceramic or porcelain tiles?
No, but you must seal the grout to prevent stains and moisture damage.